Adding a Quick Info for a Custom Tool
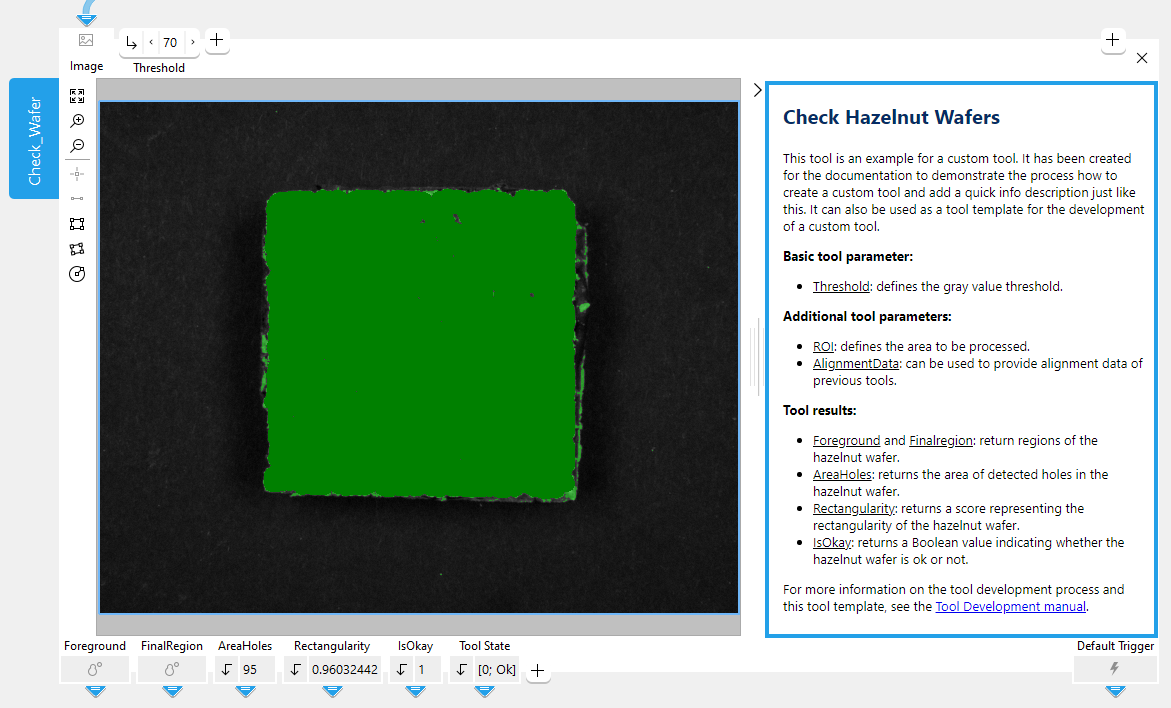
Each of the standard MERLIC tools that are part of the MERLIC installation provides a short documentation in the tool board, called Quick Info. It usually contains a description on how to use the tool and other important information on the tool parameters or results. You can also provide such a Quick Info for your custom tool. The image below shows an example how the Quick Info of a custom might look.
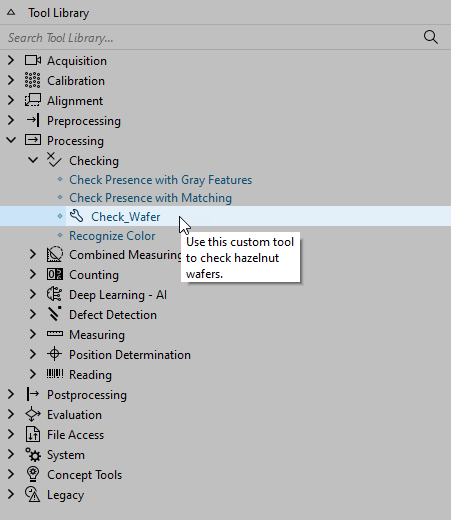
In addition, you can also add a tooltip that appears when hovering the mouse cursor over your custom tool in the Tool Library as shown in the example below.
For a custom Quick Info and a tooltip in the Tool Library, it is required to save the respective files in a specific location, file structure, and also with the correct file names as described in the next section.
Required File Structure and Location
MERLIC requires a predefined file structure for the Quick Info and the Tool Library tooltip of a custom tool. You have to create a directory next to the procedure file representing the custom tool and name this directory after the respective tool name with the suffix "_Docu". In this directory, you have to create further subdirectories; one for each language in which you want to provide a documentation. Then, you can create the actual files of the Quick Info and the Tool Library tooltip and save then in these language directories.
The following block shows the required structure of the documentation directory for an example custom tool named "Check_Wafer".
- de-de
-- Check_Wafer.html
-- tooltip.html
- en-us
-- Check_Wafer.html
-- tooltip.html
- ja-jp
-- Check_Wafer.html
-- tooltip.html
- zh-cn
-- Check_Wafer.html
-- tooltip.html
As you can see in the example structure, the Quick Info and tooltip files must be provided in HTML. The name of the tooltip file must be defined as "tooltip.html" for all custom tools. However, the name of the Quick Info file must correspond to the name of the custom tool.
In the following, we give a step-by-step description how to add a Quick Info and a tooltip for a custom tool.
Available Languages for the Quick Info and Tooltip
You can provide a Quick Info and tooltip for a custom tool in all languages that are available for MERLIC: English, German, Japanese, and simplified Chinese. However, it is not possible to add the Quick Info in further languages because the language setting of the Quick Info and the tooltip is determined by the language setting in the MERLIC preferences.
For example, if you set the language in MERLIC to German, the HTML files in the respective language directory, i.e., "de-de", will be used. Thus, the Quick Info and the tooltip are shown in German. Therefore, the Quick Info and the tooltip can only be displayed in one of the predefined MERLIC languages.
In case no HTML files could be found in the corresponding language directory, no Quick Info will be shown at the tool and in the Tool Library no tooltip is displayed when hovering the mouse over the custom tool.
Adding a Quick Info and Tooltip
- Go to the directory in which the custom tool, i.e., the HDevelop procedure library, is stored.
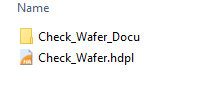
- Create a new directory with the following name: <name of the custom tool> + "_Docu". In the example image below, the name of the custom tool is "Check_Wafer". Therefore, we created a new directory with the name "Check_Wafer_Docu".
-
Go to the new "*_Docu" directory and create a directory for each language in which you want to provide a Quick Info and a tooltip. You can choose from all languages in which MERLIC is available. The directories must be named after the respective language code. The following table shows the available languages and the respective language codes that need to be used as directory names.
Language
Required name of directory
English
en-us
German
de-de
Japanese
ja-jp
Simplified Chinese
zh-cn
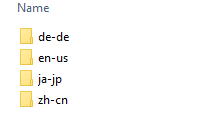
It is not required to create directories for all languages. It is possible to create only one language directory if you want to provide the Quick Info of your custom tool only in one language. In this case, no Quick Info will be shown at the tool if the MERLIC Creator is used in a different language. In the example image below, we created directories for all languages. In the next step, you can start to create the HTML files for the Quick Info and the tooltip.
- Open a text editor and start writing the documentation that will be shown as Quick Info at the tool. You can use the following template as basis. Alternatively, you can also use the Quick Info file of a standard MERLIC tool as basis. You can find these in the directory "help\quick_info\<language>\Content\Tools\<tool_name>" within your MERLIC installation directory.Copy
<!doctype html>
<html>
  <head>
    <meta charset="utf-8">
    <meta name="viewport" content="width=device-width, initial-scale=1.0">
  </head>
  <body>
    <h1><span style="color: #062D64;">Quick Info Heading</span></h1>
    <p>Insert your Quick Info description here.</p>
  </body>
</html>
You can add css styles to your elements and also add external hyperlinks. They will be opened in the default internet browser.
-
Save the Quick Info as HTML file (*.html) in the respective language directory with the name of the custom tool, e.g., "Check_Wafer.html".
-
If you want to provide a tooltip that is shown when hovering the mouse pointer over the custom tool in the Tool Library, create a new HTML file for the tooltip and save it under the name "tooltip.html" in the respective language directory. You can use the following template.
Copy<!doctype html>
<html>
<head>
<meta charset="utf-8">
<meta name="viewport" content="width=device-width, initial-scale=1.0">
</head>
<body>
<p>This is the tooltip text.</p>
</body>
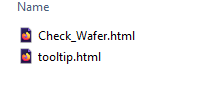
</html>In the example image below, you can see the example HTML files in one of the language directories.
- If you want to provide the Quick Info and tooltip also in other languages, create the HTML files for the other languages and save them in the respective language directory.
- To check your Quick Info in MERLIC, you have to integrate the custom tool in MERLIC as described in the topic Integrating a Custom Tool in MERLIC and add your custom tool to the workspace. If you make some further adjustments at the description or the style, you can change the HTML file and add the custom tool in MERLIC again to instantly see the changes on the tool board.

