MERLIC Preferences
When you personalize the user interface, your choices will be saved in the MERLIC5.ini file. For information about changing the settings directly in the MERLIC5.ini file see The MERLIC .ini File.
Reorganizing the Panels
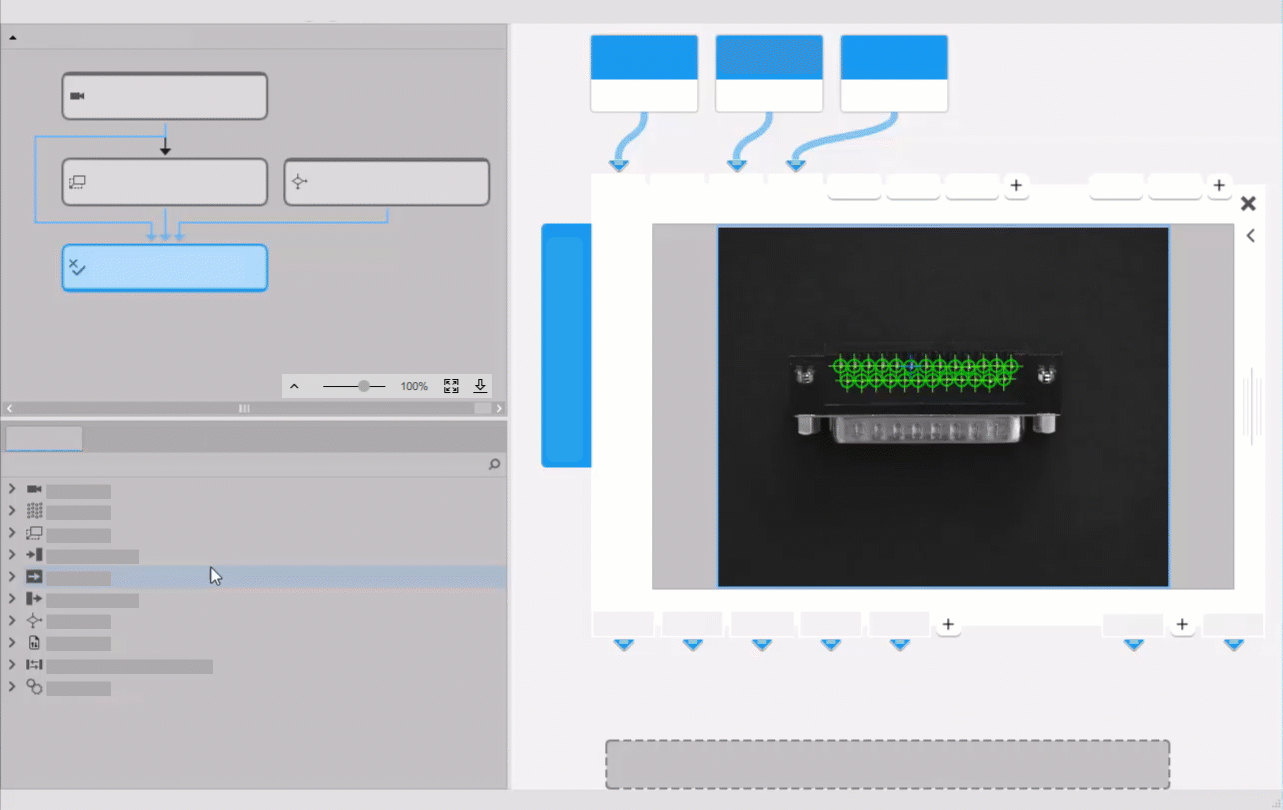
All panels in the MERLIC Creator can be moved and docked to particular parts of the window. This means that you can move them until they are in a convenient position to work with them. It is also possible to drop panels on top of each other and use them like tabs.
- Move the mouse over the title of the panel you want to move.
- Drag the panel to the part of the window where you want to dock it. While moving the panel a blue highlighted area indicates the position in which the panel will be docked.
- If the desired area in the user interface is highlighted, drop the panel to dock it to the new position.
Setting Preferences
The MERLIC preferences dialog allows you to define various settings for MERLIC such as user interface preferences and log options.
To open the dialog, click on the menu "Edit → Preferences" in the MERLIC Creator. The available settings are provided in the following tab cards:
The "General" and "Colors" tabs are visible for all users and all types of MERLIC licenses. The "Custom Tools" tab is only visible if your license allows the implementation and use of custom MERLIC tools.
In the following, the available options in the tabs are described. For some preferences, it is necessary to restart MERLIC to make the changes effective. You can restore the default settings of the available options using the button "![]() Restore Defaults". However, only the settings in the active tab card are restored.
Restore Defaults". However, only the settings in the active tab card are restored.
General Tab
In the "General" tab you can adjust the settings for the user interface, disable the update notification dialog, enable the Tool Flow options, and define the log options.
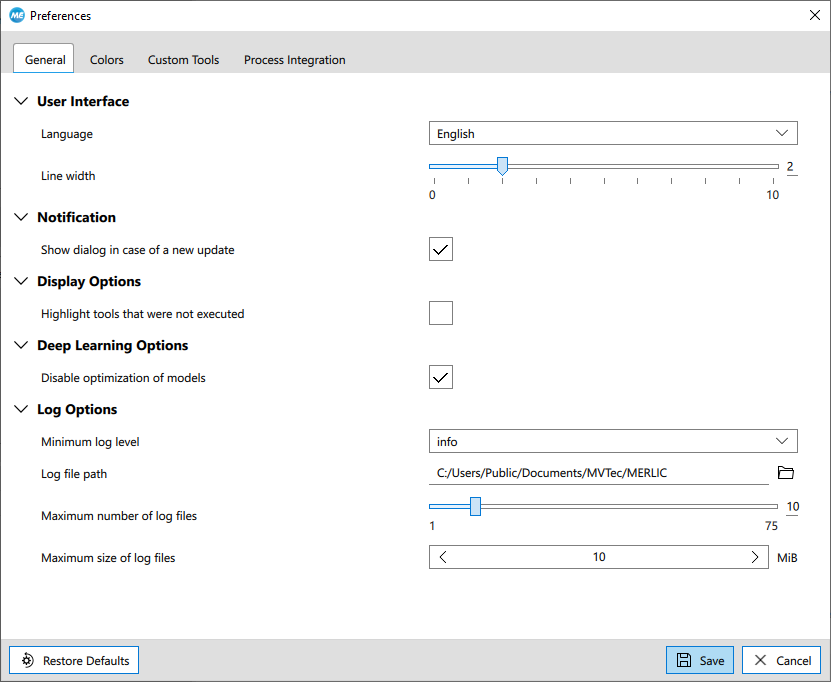
User Interface
|
User interface option |
Description |
|---|---|
|
Language |
This option allows you to change the language of the user interface. By default MERLIC uses the language that has been selected in the installation process of MERLIC. You may select a different language from the list of the drop-down menu. A restart of MERLIC is needed if a different language is selected to apply the language change. The following languages are available:
|
|
Line width |
This option allows you to adjust the width of lines that are visualized in MERLIC, e.g., the border width of regions visualized by easyTouch. It is defined in pixels. The new line width only takes effect in the tools that will be added after the line width adjustment. |
Notifications
The option in this category allows you to choose whether MERLIC shows a dialog upon startup that notifies the user when a new update is available. Per default, the notification is enabled. If an update is available, the notification dialog will remind you of the update upon every startup until you have updated your MERLIC version. However, you have the possibility to disable the notification by either removing the check from the checkbox in the notification dialog itself or in the "Preferences" dialog.
Deep Learning Options
This property can be used to enable or disable the dynamic optimizations via the NVIDIA® CUDA® Deep Neural Network library (cuDNN).
This optimization refers to MERLIC tools with deep learning technology, for example, Detect Anomalies.
By default, the respective checkbox is activated which means that no additional optimization is performed. To enable the optimizations, remove the tick from the checkbox. The optimizations will then be performed when selecting a GPU as processing unit in a MERLIC tool. Depending on the capabilities of the selected GPU, the enabled optimization might take significantly more time, but it usually leads to better inference performance and thus, decreasing cycle times. With the optimization, the duration required for the following processes will be improved:
- Loading MVApps that contain MERLIC tools with deep learning technology
- When configuring a MERLIC tool with deep learning technology:
- Applying the training data, provided a training mode is available for the tool
- Selecting a different model file
- Setting the processing unit to a GPU
If you want to use the cuDNN optimization, make sure to update the driver of your GPU to the latest version. Otherwise, the optimization via the cuDNN library might not be supported. If this setting is changed, MERLIC needs to be restarted.
Display Options
The option in this category allows you to choose whether MERLIC highlights the tools that were not executed in the last iteration. For more information see the topic Tool Flow.
Log Options
The information in your log files can be very helpful to detect errors and to check the data exchange in MERLIC with Process Integration.
|
Log option |
Description |
|---|---|
|
Minimum log level |
This property defines the used log level. Logging of messages of a given level generally includes the logging of all messages of stricter levels. The available log levels are the following:
|
|
Log file path |
This property defines the path to the directory in which the log file is stored. Use the |
|
Maximum number of log files |
This property defines the number of recently created log files that are kept in the log file directory while MERLIC is running for the case that one of the log files exceeds the configured maximum size. Log files are deleted starting with the oldest log file. If none of the log files exceed the configured maximum size, the number of log files in the log folder is not limited. Additionally the log folder will contain log files that are currently being created. |
|
Maximum size of log files |
This property defines the maximum size of the log files in bytes. If the maximum size of the log file is reached, MERLIC will start to log the new messages into a new file. Minimum value: 1 048 576 = 1 Megabyte |
For more information, see the topic The MERLIC .ini File.
Colors Tab
In the tab "Colors" you can change various default colors for the visualization in the graphics window, e.g., the highlight color for the easyTouch preview.
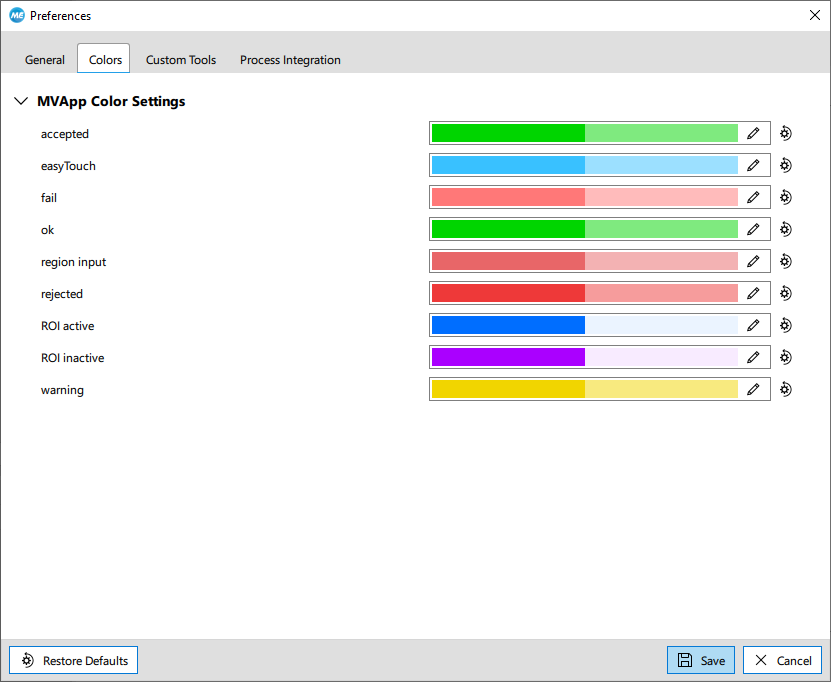
By default, regions of interest (ROIs) are highlighted and their area is drawn with a higher transparency. This is visualized by a bi-colored icon.
- Click on the color bar or
 icon of the respective element to open the color selection dialog.
 - Choose a basic color or define a custom color by selecting the desired color in the color space or by editing the values directly.
- Click the "OK" button to confirm the selection.
- You also have the possibility to reset the color of the element. Select the element click on the "
 Restore Defaults" button on the right to reset the color.
You also have the possibility to define the colors via the The MERLIC .ini File section in the .ini file.
Custom Tools Tab
In the tab "Custom Tools" you can enable debugging options for your custom tools and specify the location of the custom tools and additional procedures.
The "Custom Tools" tab is only visible in the "Preferences" dialog if your MERLIC license includes the add-on "Extension Tools". Find out more about the MERLIC license packages on www.mvtec.com.
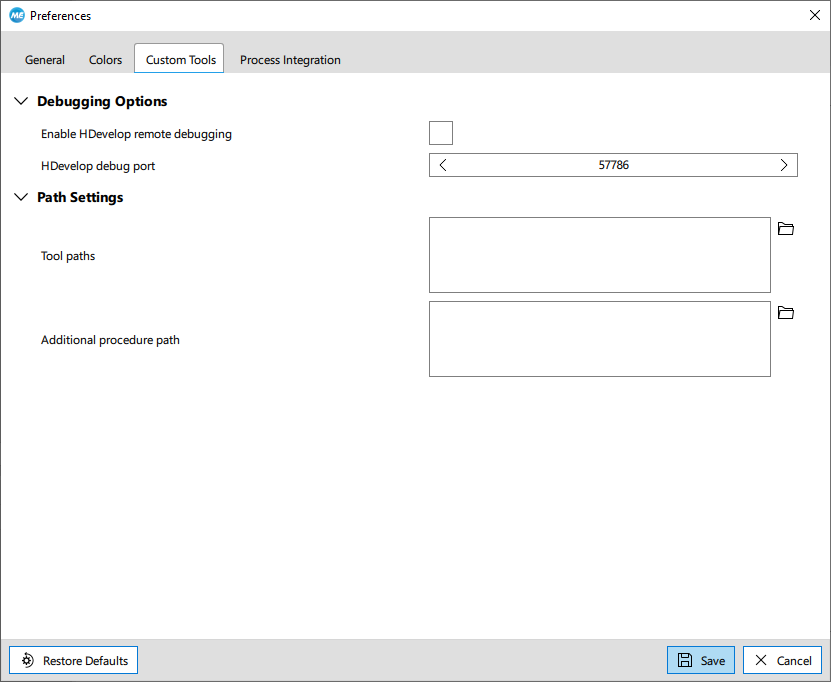
Debugging Options
The options in this category allow you to use the remote debugging mode for your custom MERLIC tools.
|
Debugging option |
Description |
|---|---|
|
Enable HDevelop remote debugging |
This option allows you to enable or disable the remote debugging for your custom MERLIC tools. If the option is enabled, the HDevelop debug server is started automatically on startup of MERLIC. By default, the option is disabled. |
|
HDevelop debug port |
This option allows you to specify the HDevelop debug port. The default port number is 57786. |
For more information on the debugging your custom MERLIC tools see the topic Debugging Tools in HDevelop of the MERLIC Tool Development Manual.
Path Settings
The settings in this category allow you to add the location of your custom tools to the MERLIC settings and thus make the custom tools available in the MERLIC Tool Library.
|
Path option |
Description |
|---|---|
|
Tool paths |
This option defines the locations where MERLIC is looking for HDevelop procedure libraries representing custom tools for MERLIC. To use a custom tool in MERLIC, you have to add the location of the respective HDevelop procedure library to the list of tool paths. Click on the To edit one of the defined tool paths, click on the path and select the desired location or delete the tool path by clicking the |
|
Additional procedure paths |
This option defines the locations where MERLIC is looking for additional HDevelop procedures that are required by the custom tools. Usually, these are custom procedures that contain functionality which is used in multiple custom tools and has therefore been stored in a separate procedure to avoid implementing the same functionality multiple times. Click on the To edit one of the defined procedure paths, click on the path and select the desired location or delete the procedure path by clicking the This option is intended only for HDevelop procedures which provide functionality that is required by your custom tools when using them in MERLIC. It is not intended for any other types of procedures such as help procedures which are required for the implementation of custom tools in HDevelop. The help procedures that are provided with the MERLIC installation for the development of custom tools, that is, the procedure libraries in the subdirectory "\examples\tool_development\procedures" need to be added in the procedure settings of the HDevelop preferences. They must not be added to the additional procedure list in MERLIC. |
When MERLIC Creator and MERLIC RTE are started, the defined tool paths are searched for files with the formats *.mvtools, *.hdpl and *.hdvp, which are then loaded and integrated into MERLIC as tools.
For more information on how to add custom tools to MERLIC see the topic Integrating a Custom Tool in MERLIC of the MERLIC Tool Development Manual.
Process Integration
In this tab, you can adjust the settings regarding the in-memory result database of MERLIC and the extended image storage to configure the number of available results for MERLIC RTE, the process integration mode of MERLIC.

In-Memory Database
In this category, you can define the maximum number of results that are stored for MERLIC RTE. Thus, it represents the number of iterations for which the results of a MERLIC Vision App execution can be stored. If the number of results exceeds the defined buffer size, the oldest results will be discarded. The same applies to data components stored along the results, such as images.
Extended Image Storage
The settings in this category allow you to configure an extended image storage for MERLIC RTE.
|
Option |
Description |
|---|---|
|
Extend storage of images on disk |
This option allows you to enable an extended image storage on your disk for MERLIC RTE. It can be used to ensure that result images will still be available when the number of results exceeds the size of the in-memory storage, that is, when MERLIC RTE starts removing the oldest results from the in-memory storage. If the extended image storage is enabled, the result images provided in the result to be removed will be moved to the extended image storage instead of removing them with the rest of the result data. Thus, the images will still be available when the respective result data has been removed. When adding an image to the extended storage, it is checked whether the allowed number of images in the extended storage is exceeded, and if required, the oldest images will be removed accordingly. |
|
Maximum number of images |
This option defines the number of images that will be cached in the extended image storage. It only applies if the extended image storage is enabled. In contrast to the setting for the in-memory storage that refers to the number of iterations for which results can be stored, this option refers to the number of images that have been moved to the extended image storage. There is no connection to the respective result anymore. For example, when using a recipe which defines two images, the result of a single execution of this recipe will contain 2 images. Thus, executing the recipe ten times will result in 20 images. If the size of the in-memory storage is set to the default value 10, the storage will be exceeded with the next iteration. If the extended image storage is enabled and the recipe is executed again, the two images of the oldest result will be moved to the extended image storage to keep them available even though the other result data of the respective iteration has been removed. For all further executions of the recipe, the oldest result will be removed from the in-memory storage but the respective images will be moved to the extended image storage. If the image storage is full, that is, if the storage already contain as many images as allowed, the oldest images will be removed with the next execution. |
|
Path of image storage |
This option allows you to specify a custom location and file name for the image storage database. By default, the images are stored in a temporary folder on the local disk. If not enough space is available on your disk, you can use this option to define a different location with enough space for the image storage. |

