Working with the Training Mode
Some MERLIC tools require a training of an individual data set before the actual image processing can be performed. These tools provide a training mode with a training area on the left of the Tool Board. The training is implemented individually for the respective tool. It might determine various parameter values, a training model, or even both by analyzing special reference images, so called training images. In most cases training parameters are provided that are used only for the training. The results of the training are also available for some tools.
In the following section, we first want to give an overview of the different types of the training mode followed by a description how to add a training image.
Types of Training Mode
The training mode of a tool might differ to the ones of other tools in several issues described below. Thus, when preparing and performing the training in a tool, keep in mind that each tool that requires a training might provide a different type of training mode which is individually adapted to the respective image processing task of the tool.
Number of Training Images
Depending on the tool, a different number of training images might be required. Some tools with a training mode require only one training image whereas other tools accept multiple training images. In a few cases, it is also necessary to select a specific type for the training images, e.g., in the tool Check Presence with Gray Features, you have to define which training images is used for good sample types and which training images are used for bad sample types.
Automatic or Manual Training
In most cases, the training is performed automatically as soon as a training image has been added or exchanged. However, there are also some tools where you have to start the training manually via an "Apply training data" button.
Effect on Other Parameters
The training mode might affect the values of different types of parameters, i.e., tool parameters for the processing and training parameters. In some tools, the training automatically readjusts the values of training parameters. However, in some other tools, the training parameters are never overwritten by the training. In this case, the training parameters are used only as input values for the training. The same applies for regular tool parameters. Some tools have a training mode that readjusts regular tool parameters whereas others never overwrite the tool parameters. If you want to change the value of a tool parameter after the training, you have to consider if the respective tool parameter might be overwritten when the training is performed anew.
How to Add a Training Image
- Run the application step by step via the "Run Once" button or via the shortcut F6 until the desired image is shown in the tool.
- If the tool allows the use of multiple training images, click on the button
 at the training area on the left of the Tool Board to add the current image as training image. Alternatively, you can use the shortcut F3 to add the image as training image. To add further training images, repeat these steps again. In case only a single training image is allowed like in "Calibrate Camera", the training image can be exchanged by the current processing image by using the button
  .
.
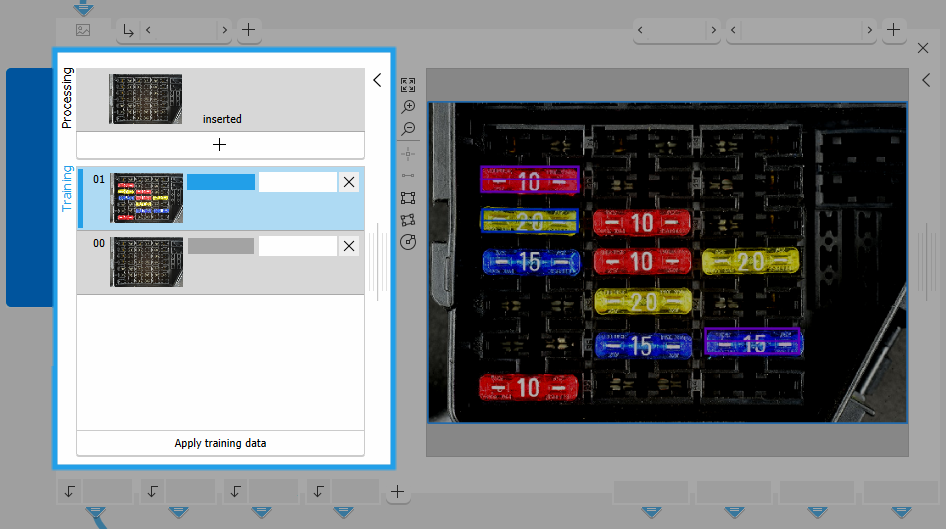
The training images will be listed in the section "Training". Each training image is added with an index number that is shown on the left of the training images. This enables you to easily recognize the overall number of training images or to identify a specific training image. In addition, the last inserted training image is automatically highlighted in blue to make it easier to find and recognize the new training image.
When stepping through the processing images via single executions of the MVApp, you can also recognize if the current image has already been added to the training image because in this case the label "inserted" is shown beside the thumbnail image on the left.
If an image is added multiple times as training image, the label "duplicate of n" will be shown at the respective training images. The number n indicates the index of the duplicated training image. This way, you get immediate feedback if the current image is already in use as a training image.
Processing Mode and Training Mode
You can switch between the processing mode and training mode by clicking on the respective area at the left of the Tool Board. Running the application automatically sets the tool in processing mode. If a training is performed manually by clicking on the "Apply training data" button in the training area of a tool, the processing mode is also activated automatically after the training.
In the training mode the parameter set for the training can be defined. In the processing mode incoming images are processed using the parameter set that was defined by the training. Regions and regions of interest (ROIs) that are connected from previous tools are only available in the processing mode. For the training the desired regions and ROIs must be selected or drawn manually in the training image.
Training Parameters and Training Results
A training mode may require special training parameters or training results. These are also visualized as connectors but in contrast to the regular parameter and result connectors, they are displayed on the top right and bottom right of the Tool Board.
Although the training results are presented in regular connectors, it is not recommended to connect them to other subsequent tools. In most training tools, the training results are updated only if a training is performed. In addition, some of the training results are used internally for further training processes.
Tools with Training Mode
Get more information on how to work with tools that have a training mode in the corresponding reference of each tool.
The following tools provide a training mode:
- Calibrate Camera
- Check Presence with Gray Features
- Check Presence with Matching
- Correct Shading
- Count with Deep Learning
- Count with Matching
- Detect Anomalies
- Determine Alignment with Matching
- Determine Alignment with Straight Border
- Level Surface
- Locate with Matching
- Read Aztec Code
- Read Bar Code
- Read Data Matrix ECC 200
- Read PDF417
- Read QR Code
- Recognize Color
- Scale Gray Range to 8 Bit

