save-images
This example plug-in demonstrates the use of the data container APIs. When the plug-in is running, it automatically saves the image data contained in MVApp results to a configurable directory on disk. The plug-in offers a rich set of configuration options to customize the image format, output directory structure, and conditions upon which to output an image. The source code for this plug-in is available in the directory "examples\communication_plugins\save-images" within the MERLIC installation directory.
Using the Plug-in
The plug-in can be tested in combination with the "action-sender" example plug-in. You can send actions via the "action-sender" plug-in and the "save-images" plug-in will store the image results on your disk.
Keep in mind that the MERLIC Vision App that is referenced in your recipe requires at least one MVApp result that represents an image result. If no image result was added to the MVApp results, no image can be retrieved from the example plug-in.
- Open the MERLIC RTE Setup and go to the "Recipes" tab.
- Import a recipe that references a MERLIC Vision App that contains at least one MVApp result representing an image result. For testing, you may also use the example recipe "verify_chip_number_recipe.mrcp".
- Set the recipe as default recipe. If you skip this step and the recipe is not set as default when starting the plug-ins, you have to load the recipe manually via the "action-sender" plug-in using the command "python.exe comm-send.py PrepareRecipe <Recipe ID>", that is, after step 9.
- Change to the "Communication" tab and start MERLIC RTE. When MERLIC RTE is running, the configuration service for the plug-ins is available.
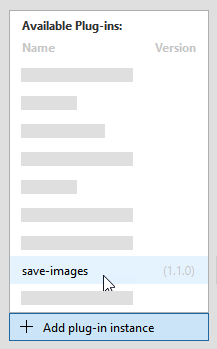
- Add the "save-images" plug-in to the list of plug-in instances on the left.
- Check the configuration of the plug-in. For more information, see the section Configuring the Plug-in.
- Start the execution of the plug-in either by clicking on the button "
 Start plug-in" on the bottom of the MERLIC RTE Setup or via the respective menu in the list of plug-in instances on the left. To get more detailed information on how to start and stop a plug-in, see Starting and Stopping Communication Plug-ins.
 - Add and start the "action-sender" plug-in the same way as the "save-images" plug-in.
- Open a command prompt and change to the directory of the "action-sender" plug-in, that is, to the directory "examples\communication_plugins\action-sender" within your MERLIC installation directory.
- Use the python script "comm-send.py" to start a single execution as shown below. The MVApp is executed once and the image results are retrieved and stored in the defined directory. You can also type "python.exe comm-send.py --help" for more usage information.Copy
python.exe comm-send.py StartSingleJob - Check the saved images in the directory defined in the configuration of the "save-images" plug-in.
Configuring the Plug-in
The example plug-in can be configured in the "Communication" tab of the MERLIC RTE Setup. Simply open the MERLIC RTE Setup and add the plug-in to see the available configuration options for the plug-in. Keep in mind that you first have to start MERLIC RTE to enable the configuration.
The parameters of the selected plug-in are shown on the right of the "Communication" tab. In the following, we will describe only the parameter in the section "User parameters" because these are the ones that can be configured.
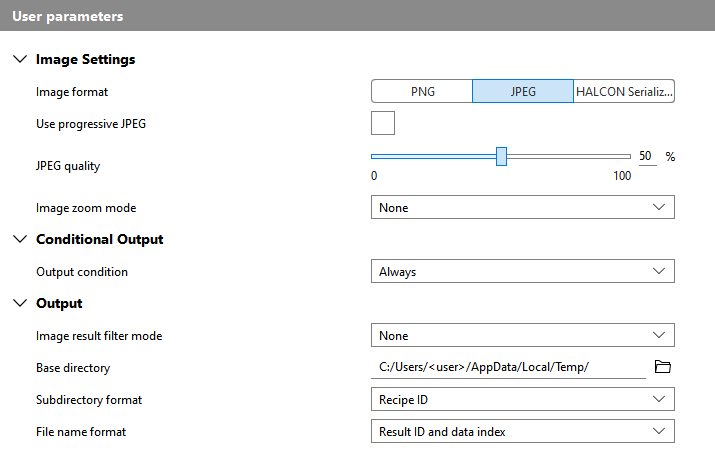
Image Settings
Image format
|
Format |
Description |
|---|---|
|
PNG |
The images will be saved as PNG images. If this format is selected, the parameter PNG compression will be enabled for configuration. |
|
JPEG |
The images will be saved as JPEG images. If this format is selected, the following additional parameters become available: |
|
HALCON Serialized Item |
The images will be saved as a HALCON Serialized Item, that is, as an .hse file. This is a proprietary format that can only be used by users who also work with MVTec HALCON. If you want to read files of this format in HDevelop, you could use the following code snippet: open_file('<file path to .hse>', 'input_binary', FileHandle) fread_serialized_item(FileHandle, SerializedItemHandle) deserialize_object(Object, SerializedItemHandle) |
In general, all images of the types "byte", "int1", "uint2", "int2", "int4", "int8", and "real" can be exported as an MVApp result and converted to the available image formats. However, images of type "real" are an exception because they can only be converted to the format "HALCON Serialized Item". For more information about the image formats and the respective pixel transformation, see the section Image Results in Configuring Communication Plug-ins
Use progressive JPEG
This parameter is only available if the parameter "Image format" is set to "JPEG".
JPEG quality
This parameter is only available if the parameter "Image format" is set to "JPEG". It defines the quality for the compression to JPEG in percent. By default, it is set to 50 %.
PNG compression
This parameter is only available if the parameter "Image format" is set to "PNG". It defines the level for the compression to PNG. It can be set to a value from 0 to 9. By default, it is set to 6.
Image zoom mode
This parameter allows you to resize the result images. The available options are listed in the table below. Depending on the selected mode, additional parameters will be enabled for configuration. By default, the parameter is set to "None".
|
Mode |
Description |
|---|---|
|
None |
The images will be saved in their original size without any zooming. |
|
Fixed width and height |
The images will be scaled to the size that is specified in the parameters Image width and Image height. |
|
Zoom factor |
The images will be resized along both dimensions by the factor that is specified in the parameter Image zoom factor. |
Image width
This parameter is only available if the parameter "Image zoom mode" is set to "Fixed width and height". It defines the width for the result images.
Image height
This parameter is only available if the parameter "Image zoom mode" is set to "Fixed width and height". It defines the height for the result images.
Image zoom factor
This parameter is only available if the parameter "Image zoom mode" is set to "Zoom factor". It defines the percentage value which is used to resize the images along both dimensions. You can also specify a value larger than 100%. By default, the parameter is set to 100 % which means that the original image size is kept.
Conditional Output
Output condition
This parameter defines if the image results are retrieved based on the value of a specific MVApp result. By default, it is set to "Always" and the images are saved independent of any MVApp result value. You can use this option for various use cases, for example, in case of quality inspections if you want to save only the images of the iterations in which bad quality was detected.
|
Condition |
Description |
|---|---|
|
Always |
The image results will always be saved independent of any MVApp result value. |
|
On result true |
The image results will only be saved if the value of a specific MVApp result is "true". The name of the MVApp result whose value should be checked can be defined in the parameter Result name. It becomes available as soon as the "Output condition" is set to "On result true". Depending on the type of the result value, the output condition is set to "true" in different cases:
|
|
On result false |
The image results will only be saved if the value of a specific MVApp result is "false". The name of the MVApp result whose value should be checked can be defined in the parameter Result name. It becomes available as soon as the "Output condition" is set to "On result false". Depending on the type of the result value, the output condition is set to "false" in different cases:
|
Result name
This parameter is only available if the parameter "Output condition" is set to "On result true" or "On result false". It enables you to enter the name of the MVApp result whose value should be verified. If the value fits the condition of the parameter setting in "Output condition", the images will be retrieved and saved.
Output
Image result filter mode
This parameter allows you to enable a filter that determines which image results will be retrieved. You can choose between the options below. By default, it is set to "None".
|
Mode |
Description |
|---|---|
|
None |
No filter is applied and all result images will be retrieved. |
|
Regular expression |
Only result images whose name matches the regular expression that is specified in the parameter Result name filter regex, will be retrieved. |
Result name filter regex
Base directory
This parameter defines the directory in which the image results will be saved. You can select the directory from the file system via the ![]() button (on local systems) or you can type the path directly into the text field. By default, it is set to "%LOCALAPPDATA%/Temp" on Windows systems and to "/tmp" on Linux systems. You can also choose to save the image results into a subdirectory of a specific format. This can be done in the parameter Subdirectory format.
button (on local systems) or you can type the path directly into the text field. By default, it is set to "%LOCALAPPDATA%/Temp" on Windows systems and to "/tmp" on Linux systems. You can also choose to save the image results into a subdirectory of a specific format. This can be done in the parameter Subdirectory format.
Subdirectory format
This parameter defines the format of the subdirectory in which the image results are saved. By default, it is set to "Recipe ID".
|
Format |
Description |
|---|---|
|
None |
No subdirectory is created. The image results will be directly saved in the location defined in the parameter "Base directory". |
|
Recipe ID |
The subdirectory is named after the ID of the currently prepared recipe, that is, the recipe that references the MVApp that is executed. |
|
Date |
The subdirectory is named after the current date of the execution. The date is formatted as follows: {year}-{month:02}-{day:02}, for example, "2022-07-18". |
|
Date and recipe ID |
The subdirectory is named after the current date and the ID of the currently prepared recipe. The resulting name of the directory is formatted as follows: {year}-{month:02}-{day:02}--{recipeId}, for example, "2022-07-18--6". |
|
Custom |
This option allows you to use a custom format for the name of the directory. The desired format can be defined in the parameter Subdirectory format string which becomes available as soon as "Custom" is selected. |
Subdirectory format string
This parameter is only available if the parameter "Subdirectory format" is set to "Custom". It enables you to define a custom format for the name of the subdirectory in which the image results will be saved. You can either type the desired name of the subdirectory into the input field or you can define the name by using placeholders that represent specific value, for example, the recipe ID. Such a placeholder must be defined in curly brackets, otherwise it would be interpreted as regular string.
The following table shows the available placeholders.
|
Placeholder for format string |
Data format |
Description |
|---|---|---|
|
{recipeId} |
String |
The ID of the currently prepared recipe. |
|
{resultId} |
Integer |
The ID of the retrieved image result. |
|
{resultName} |
String |
The name of the respective MVApp image result, that is, the name that has been defined when adding the image result to the MVApp results in the MERLIC Creator. If there are more than one MVApp image results, multiple subdirectories will be created; one for each MVApp image result with the respective name. |
|
{dataIndex} |
Integer |
The index of the MVApp image result. It corresponds to the position number that is assigned to the MVApp image result in the "MVApp Parameters and Results" panel of the MERLIC Creator. |
|
{year} |
Integer |
The current year at the time of execution. |
|
{month} |
Integer |
The current month at the time of execution. |
|
{day} |
Integer |
The current day at the time of execution. |
|
{hour} |
Integer |
The current hour at the time of execution. |
|
{minute} |
Integer |
The current minute at the time of execution. |
|
{second} |
Integer |
The current second at the time of execution. |
|
{millisecond} |
Integer |
The current millisecond at the time of execution. |
|
{<NAME_OF_MVAPP_RESULT>} |
String |
The value of the specified tool result that has been defined as MVApp result with the name "<NAME_OF_MVAPP_RESULT>". This format is useful if you want to use or add the value of a tool result in the name of the subdirectory. Therefore, you can only specify the names of MVApp results that do not represent an image. Keep in mind to use the name of the MVApp result instead of the name of the respective tool result when using this format string. |
|
{measId} |
String |
The measurement ID assigned to the job which produced the image result, or "null" if none was provided. |
|
{partId} |
String |
The part ID assigned to the job which produced the image result, or "null" if none was provided. |
All time-specific placeholders represent the UTC time. You can also use additional format specifier for the placeholders, that is, {<placeholder>:<format specifier>}, to configure the name more precisely. For example, if the "Subdirectory format" is set to "Date", the following placeholder and format specifier are used: {year}-{month:02}-{day:02}. For more detailed information on the available format specifier, see the documentation of the {fmt} formatting library.
File name format
This parameter defines the format of the file name for the saved image results. By default, it is set to "Result ID and data index".
|
Format |
Description |
|---|---|
|
Result ID and data index |
The file names consist of the result ID and the data index. |
|
Time and data index |
The file names consist of the current UTC time and the data index, for example, "13-20-00-831--0.jpg". |
|
Time and result name |
The file names consist of the current UTC time and the result name of the respective MVApp image result, for example, "13-20-00-831--Heatmap.jpg". |
|
Result ID and result name |
The file names consist of the result ID of the respective image result and the name of the corresponding MVApp image result, for example, "37-Heatmap.jpg" |
|
Custom |
This option allows you to use a custom format for the name of the file name. The desired format can be defined in the parameter File name format string which becomes available as soon as "Custom" is selected. |
File name format string
This parameter is only available if the parameter "File name format" is set to "Custom". It enables you to define a custom format for the file names of the image results. You can either type the desired file name into the input field or you can define the name using placeholders that represent specific value, for example, the recipe ID. Such a placeholder must be defined in curly brackets, otherwise it would be interpreted as regular string. For more information about the available placeholders, see the description of the parameter Subdirectory format string.

