Apply Region Morphology
Use this tool to eliminate or emphasize spots by filtering the region using different morphology methods.
The tool requires that the regions are available and delivered from a previous tool.
Parameters
Basic Parameters
Image:
Use this parameter to set an image as background. This should usually be the image, the processed features e.g., contours or ROIs are based on. If no image is connected, the background will be black.
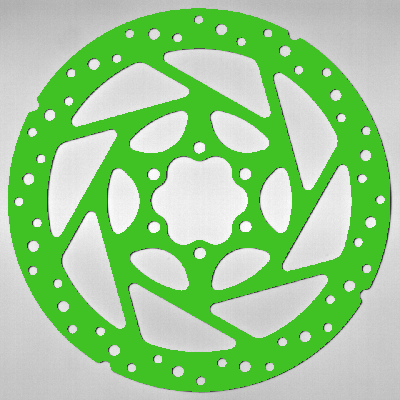
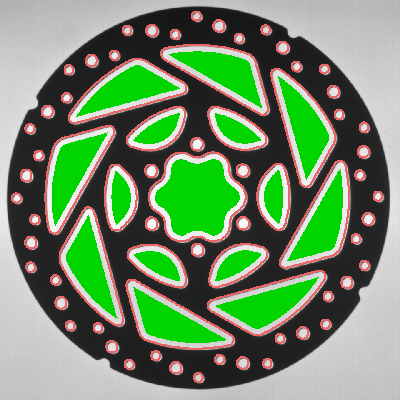
Regions:
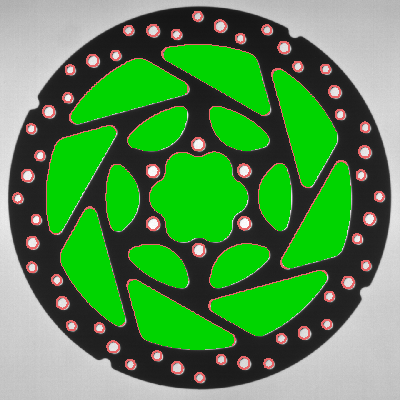
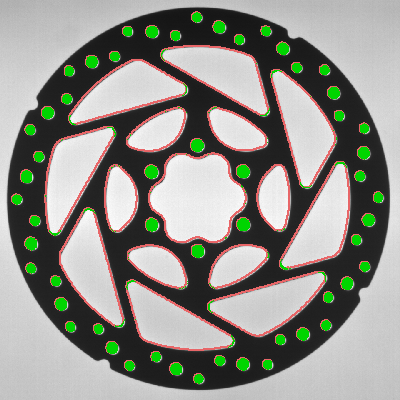
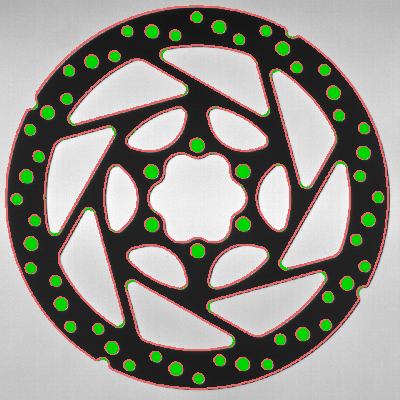
This parameter represents the input regions to which a filter method should be applied. The regions must be delivered from a previous tool. Therefore, you have to connect the parameter to an appropriate result of a previous tool. The connected region is then used as input. The margin of the regions is highlighted in the defined color for 'region input', e.g., red by default. This makes it easier to distinguish the input regions from the transformed regions.
Method:
This parameter defines the method used for the region morphology. By applying a region morphology "Method", regions can be improved by eliminating unwanted structures in the region or emphasizing other structures. As a default, "opening" is selected as "Method". You can select a different method from the combo box of the corresponding parameter.
|
Value |
Description |
Usage |
Original Region |
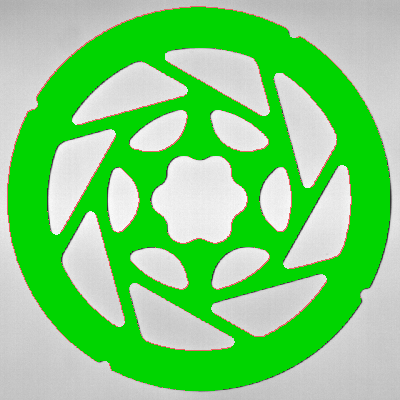
Filtered Region |
|---|---|---|---|---|
|
dilation |
To dilate an input region, a structuring element is applied to the input region. This structuring element is scanned over the image line-by-line. During "dilation" the reference point of the structuring element is added to the resulting region whenever the structuring element and the input region have at least one pixel in common. This results in an enlarged region. |
Use this method to expand the area of the region. |
|
|
|
erosion |
To erode an input region, a structuring element is applied to the input region. This structuring element is scanned over the image line-by-line. "erosion" reduces the area of the input region because the reference point is only added to the resulting region if the structuring element lies completely within the input region. |
Use this method to reduce the area of the region. |
|
|
|
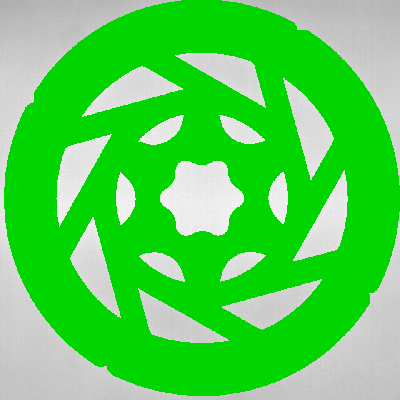
opening |
"opening" is the opposite of "closing", i.e., an "erosion" followed by a "dilation". By applying "opening" to a region, larger structures remain mostly intact, while small structures like lines or points are eliminated. "opening" serves to eliminate small regions and to smooth the boundaries of a region. |
Use this method to eliminate small regions. |
|
|
|
closing |
"closing" is the opposite of "opening", i.e., a "dilation" followed by an "erosion". By applying "closing" to a region, larger structures remain mostly intact, while small gaps between adjacent regions and holes are closed, and the regions' boundaries are smoothed. All closing variants share the property that separate regions are not merged, but remain separate objects. |
Use this method to fill small holes in the region. |
|
|
|
top hat |
"top hat" computes the difference between the original region and the result of "opening". In contrast to "opening", which splits regions under certain circumstances, "top hat" computes the regions removed by such a splitting. |
Use this method to get small regions. |
|
|
|
bottom hat |
"bottom hat" computes the difference between the original region and the result of "closing". In contrast to "closing", which merges regions under certain circumstances, "bottom hat" computes the regions generated by such a merge. |
Use this method to get small holes within the region. |
|
|
Mask Size:
The mask size changes the effect of the filters. Whereas 1 is a small filter size, 100 is a large one. As a default, the "Mask Size" is set to 3 px. You can select a different "Mask Size" from the slider of the corresponding parameter.
If the "Mask Shape" is set to "circle", the "Mask Size" refers to the radius of the circle. If the "Mask Shape" is set to "square", it refers to 1/2 of the length of a side of the square that is used for filtering the region.
Additional Parameters
Mask Shape:
There are two shapes available that influence the effect of the mask as described below. As a default, "circle" is selected as "Mask Shape". You can select a different shape from the combo box of the corresponding parameter.
|
Value |
Description |
|---|---|
|
circle |
If this value is set, a circular mask shape is used. The parameter "Mask Size" refers to the radius of the circle that is used for filtering the region. |
|
square |
If this value is set, a square mask shape is used. The parameter "Mask Size" refers to 1/2 of the length of a side of the square that is used for filtering the region. |
Results
Basic Results
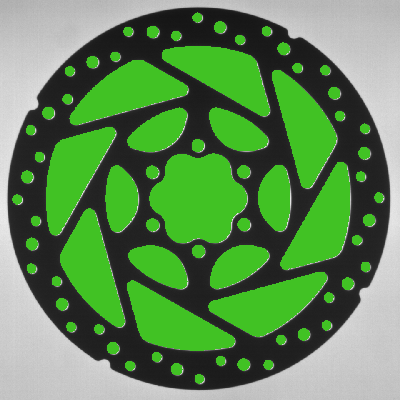
Transformed Regions:
The result is a region that has been transformed with a selected method.
Tool State:
"Tool State" returns information about the state of the tool and thus can be used for error handling. For more information, see Tool State Result
Additional Results
Processing Time:
This result returns the duration of the most recent execution of the tool in milliseconds. The result is provided as additional result. Therefore, it is hidden by default but it can be displayed via the ![]() button beside the tool results. For more information see the section Processing Time in the tool reference overview.
button beside the tool results. For more information see the section Processing Time in the tool reference overview.
Application Examples
This tool is used in the following MERLIC Vision App examples:
- classify_and_inspect_wood.mvapp
- count_defect_clusters.mvapp
- detect_only_scratches_with_photometric_stereo.mvapp

