Defining a Preview for a MERLIC Vision App
Upon startup of the MERLIC Creator the start dialog appears as long at is not disabled. It provides quick access to introductory material and documentation as well as the possibility to either opening a new MVApp, opening an already existing MVApp, or getting further information about existing MVApps. Find out more about the start dialog in the topic Start Dialog.
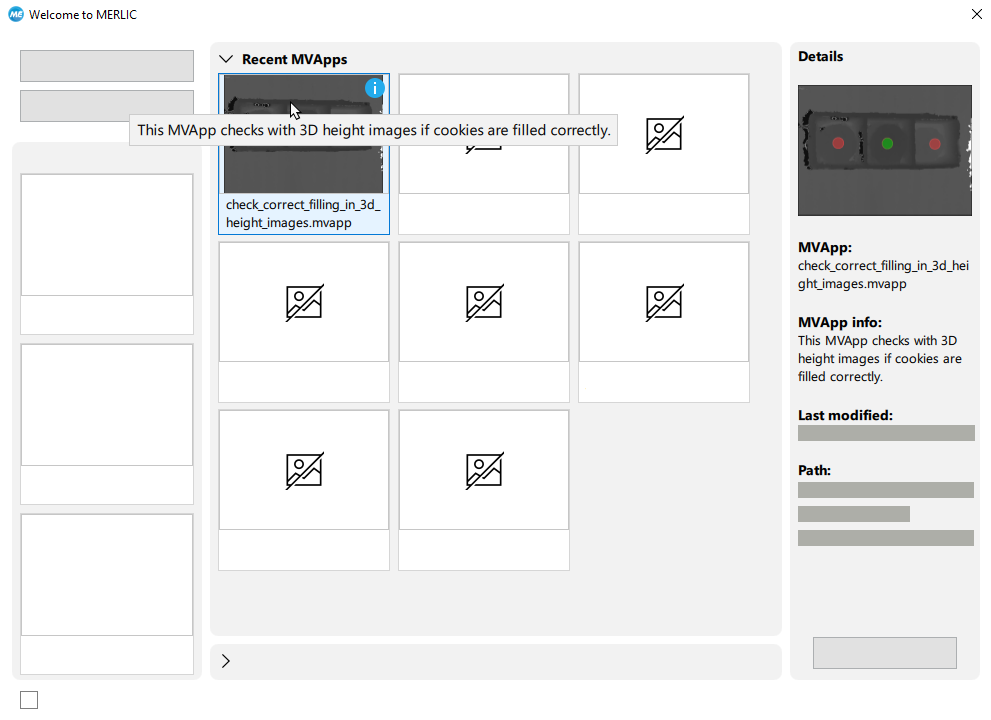
In the area "Recent MVApps" of the start dialog, you can see which MVApps you have most recently worked on. Clicking on an MVApp in the area "Recent MVApps" gives you access to further information in the area "Details" on its right. Some of the information about your MVApps in the start dialog is automatically provided, i.e., its name, when it was last edited, and the path to its directory. However, there are two elements that need to be manually defined for them to appear: the MVApp preview image and the MVApp info.
Preview Settings Dialog
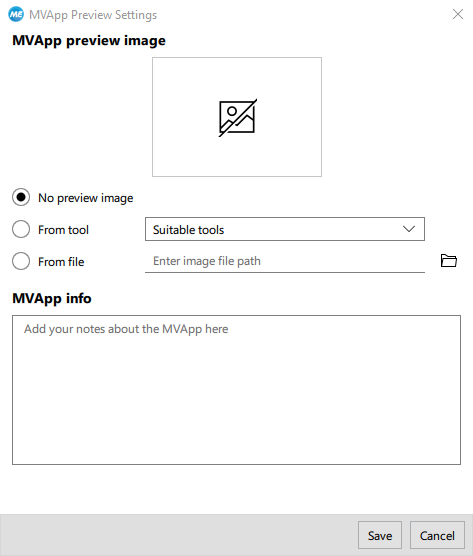
The preview image and the additional information for an MVApp can be defined manually for each MVApp via the "Preview Settings" dialog in the "Edit" menu of the MERLIC Creator.
Defining an MVApp Preview Image
By default, no MVApp preview image is defined and a placeholder image is shown instead. There are two possibilities to define your own preview image for your MVApp. You can either choose an image from one of the tools or an image from your own directory. If you are editing the preview image of an MVApp that already has a defined preview image, you also have the option to keep the current preview image.
Choosing an MVApp Preview Image from Tool
If you would like to choose an image directly from your MVApp, follow these steps:
- Before opening the "Preview Settings" dialog, select the image you would like to use as the basis of your preview image by clicking the button"
 Run Once" in the MERLIC Creator repeatedly, until you arrive at the image of your choice. In a further step, you will be able to select which image processing step of the selected image you would like to use as preview image.
 - Open "Edit → Preview Settings" from the menu in the MERLIC Creator.
- Choose one of the suitable tools from the drop-down. In this context, a tool is suitable if it inputs or outputs at least one image parameter or result. A preview of the image is visible on the top of the "Preview Settings" dialog.
- Save your changes.
- Save your MVApp for the changes to appear in the start dialog.
Choosing an MVApp Preview Image from File
If you would like to choose an image from file, follow these steps:
- Choose an image from file by either clicking on the icon
 and browsing for a file or entering a file path. A preview of the image is visible on the top of the "Preview Settings" dialog.
 - Save your changes.
- Save your MVApp for the changes to appear in the start dialog.
Adding information about an MVApp
You have the possibility to define your own MVApp info, e.g., a description or a comment. The MVApp info will be accessible in two ways via the start dialog:
- The icon
 will be visible at the top right of the preview image of the MVApp. Hovering over the icon will show the MVApp info. If no additional information is defined, the icon will not appear.
 - The MVApp info will also be visible in the "Details" area of the start dialog when an MVApp is selected. If no additional information is defined, the section "MVApp info" in the "Details" area of the start dialog will remain empty.
Make sure to save both your changes in the "Preview Settings" dialog and your MVApp for the MVApp info to appear in the start dialog.

