Configuring Image Sources from File
To enable the configuration options for an image source from file, that is, for an image file directory, you have to activate the image source configuration that contains the respective image source. Only then it is possible to acquire images from the selected source and to check them in the image preview. For more information about the activation, see the topic Activating the Configuration
As soon as the image source configuration is active, you can select the image source you want to configure as described in the next section.
Selecting an Image File Directory
To check the images of an image file directory, select the respective image source from the active configuration on the left.
- Expand the active image source configuration to display the list of image sources.
- Click on the desired image source to select it for the configuration.
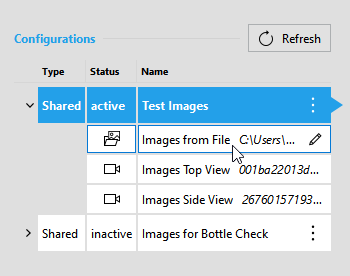
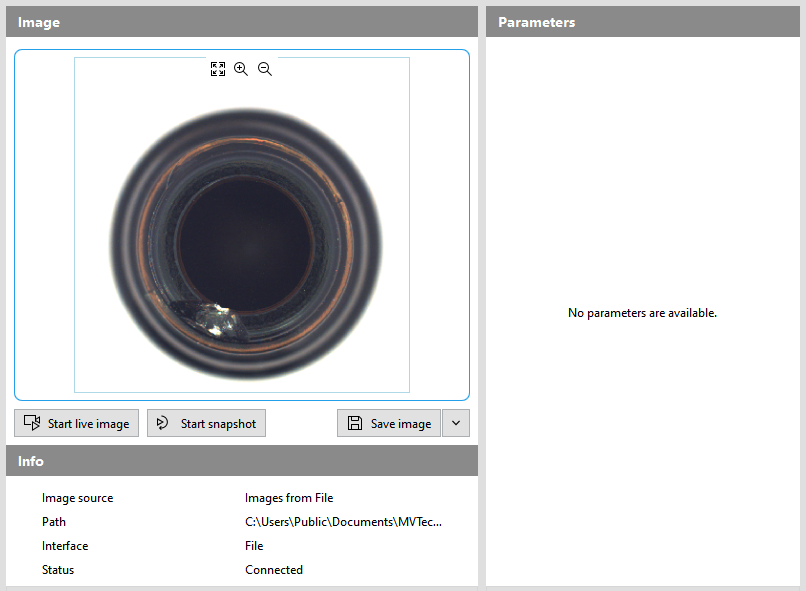
The respective details of the selected image file directory will be loaded and shown on the right of the image source list. You can then use the image preview area to check the image files in the selected image file directory, save specific or all image files in a different location, and look up further information on the image source in the "Info" area. As there are no camera parameters to configure, the "Parameters" section on the right remains empty.
After selecting a new or different image source, it might be necessary to update the image view via the "![]() Start snapshot" button on the bottom of the image preview.
Start snapshot" button on the bottom of the image preview.
Checking the Image Files
You can use the image preview to check the images provided in the respective image file directory. For this, you can acquire the images, zoom in and out of the image for further inspection, and also save the currently displayed image.
The image preview does not represent the exact image that will be acquired by MERLIC and used within your application. For more information about how to use configured image sources in a MERLIC Vision App, see the topic Using Image Sources in MVApps.
Acquiring Images for the Preview
You can acquire images in two different ways: in a live mode or by taking snapshots of single images.
Acquiring Images in Live Mode
In the live mode, the images are acquired continuously from the file directory.
To start the live mode, click on the button "![]() Start live image". To stop the live mode, use the "
Start live image". To stop the live mode, use the "![]() Stop live image" button.
Stop live image" button.
Acquiring a Single Image
To acquire only a single image from the file directory, click on the button "![]() Start snapshot". To stop the request for a single image, for example, in case of a timeout, use the "
Start snapshot". To stop the request for a single image, for example, in case of a timeout, use the "![]() Stop snapshot" button.
Stop snapshot" button.
Zooming Images
You can adjust the image section of the images you are acquiring for the image preview. This is useful, for example, if you want to make sure that certain parts of the acquired image are in focus. You can zoom an image in different ways:
- Drawing the area to be zoomed into the image
- Using the icons in the zooming toolbar
- Using keyboard shortcuts
This feature is only meant for the configuration in the Image Source Manager. The images that MERLIC acquires will remain unzoomed. To zoom the images that are acquired to be used in your MVApp, you can use the MERLIC tool Zoom Image.
Drawing the Area to be Zoomed into the Image
To zoom a specific part of an image, right-click into the image and draw a rectangle over the area you wish to zoom. When using the right-click while hovering over the image, your cursor changes into the ![]() icon. The right-click selection overrides the aspect ratio of the image. The selected section will be stretched to fit the size of the image display in the "Image Sources" tab.
icon. The right-click selection overrides the aspect ratio of the image. The selected section will be stretched to fit the size of the image display in the "Image Sources" tab.
Using the Icons Zooming Toolbar
You can use the icons in the zooming toolbar to zoom in and out of an image at a specific position without changing the aspect ratio. When using the ![]() and
and ![]() icons, the position of the mouse cursor determines where the image is zoomed.
icons, the position of the mouse cursor determines where the image is zoomed.
|
Icon |
Description |
|---|---|
|
|
Reset the image to its original size. |
|
|
Activate the zoom in mode by clicking the The icon is grayed out when the image cannot be zoomed in any further. |
|
|
Activate the zoom out mode by clicking the The icon is grayed out when the image cannot be zoomed out any further. |
Using Keyboard Shortcuts for Zooming
When using the keyboard shortcuts to zoom the image, it is zoomed in the center of the image without changing the aspect ratio.
|
Shortcut |
Description |
|---|---|
|
Ctrl + 0 |
Reset the image to its original size. |
|
Ctrl + + |
Zoom into the image. |
|
Ctrl + - |
Zoom out of the image. If the image already fits the graphic window, this shortcut is disabled. |
|
Ctrl + mouse wheel |
Zoom into and out of the image at the position of the mouse cursor. |
|
Ctrl + left click |
Move around within the zoomed image. Using this shortcut, your cursor changes into the |
Saving Snapshots
You can save the snapshots of the image files to any location on your computer. This allows you to save the images on the system that is used to develop the MVApp independent from the system on which the MVApp is used.
Defining the Location and File Name
- Click on the button with the small arrow next to the button "
 Save image". For small window sizes, the button only shows the icon without text.
 - Enter the path and file name into the input field or click on the
 icon to define the location and file name in the file selection dialog. You can save the image either in PNG format or in JPEG format. Other file formats are currently not supported. In the next step, you can save the image in the defined location.
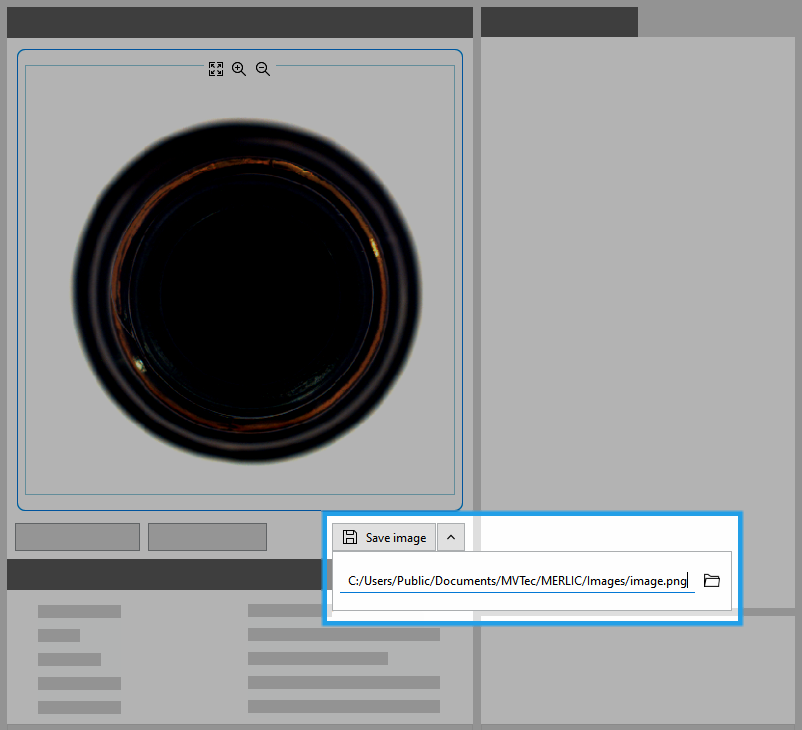
Saving the Image
Click on the button "![]() Save image" to save the image to the predefined location.
Save image" to save the image to the predefined location.
If multiple images are saved without changing the file name and location, an index number will be added as a suffix to the file name, for example, "image_1.png" and "image_2.png". If no file name and no file path has been defined yet, the file selection dialog will be opened.
You can also save images when you are acquiring images for the preview in the live mode. Then, the image that was acquired at the time when you clicked on the "![]() Save image" will be saved.
Save image" will be saved.
Looking Up Further Information
You can get further information on the selected image source beneath the image preview in the "Info" area.
|
Info |
Description |
|---|---|
|
Image source |
Name of the image source |
|
Path |
Path of the image file directory |
|
Interface |
Image acquisition interface |
|
Status |
Current status of the image source |

