Configuring Peripheral Devices
To enable the configuration options for an image source, you have to activate the image source configuration that contains the respective image source. Only then it is possible to configure the device in combination with the desired image source for the image acquisition. For more information about the activation, see the topic Activating the Configuration
In the following, we describe how to configure devices that were added as an image source with the option that no images shall be acquired from that device. Usually, this option is required for peripheral devices such as lighting or lens controllers. For the sake of simplicity, will therefore refer to this type of image sources as peripheral devices in this topic.
Selecting the Device
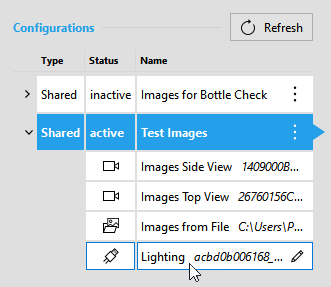
To start the configuration of a peripheral device, select the respective image source from the active configuration on the left.
- Expand the active image source configuration to display the list of image sources.
- Click on the desired image source to select it for the configuration. You can recognize peripheral devices by the icon
 .
.
The respective details of the selected device will be loaded and shown on the right of the image source list.
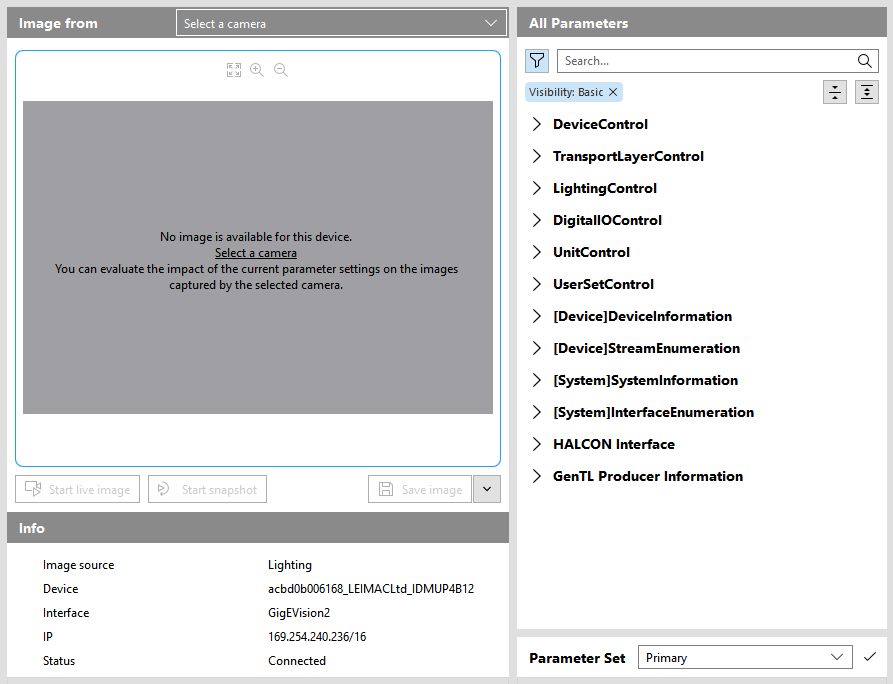
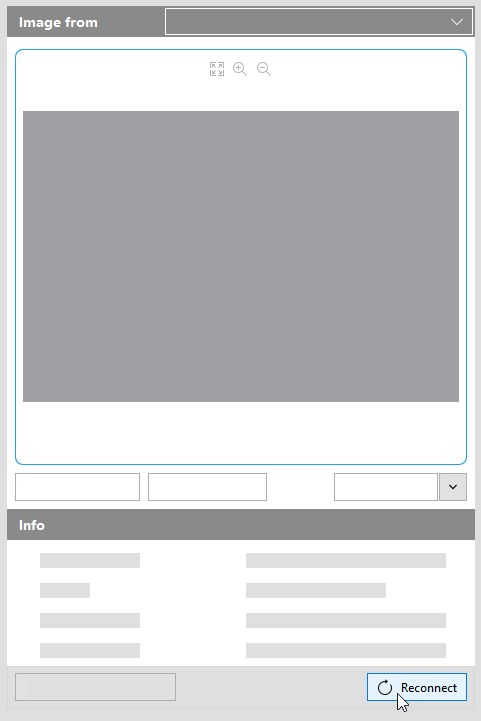
The configuration area is similar to the configuration for camera devices. There are basically three sections: an image preview, a section with general information on the device, and a section with the parameters of the device.
The image preview allows you to check the effects of your current settings of the peripheral device in images that were acquired from a camera device. For example, if your peripheral device represents a lighting controller that is used to illuminate the objects you want to check in your MVApp, you can use the image preview to display the live images of a camera device that acquires the images of the objects. This allows you to instantly check in the image preview whether the settings of your lighting controller already fit or whether further parameter adjustments are required for the lighting controller. To use the image preview, you have to select the camera whose images you want to check as described in the next section.
Selecting an Image Source for the Image Preview
If you configure a peripheral device for the first time, no image will be visible in the preview because no image source has been selected yet. If you want to see the effects of your parameter changes for your peripheral device in live images, you have to select the desired camera device. You can then start the live mode for the selected camera device and check how the current settings of the device parameter affect the acquired images of the camera.
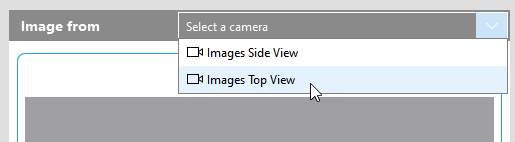
- Open the drop-down menu next to the title of the image preview.
- Select the camera whose images you want to use as reference during the configuration. You can choose from image sources that are part of the same image source configuration and represent a camera device. Image sources of other image source configurations or other image source types cannot be selected.
- Start the live image mode with the "
 Start live image" button or take a snapshot with the "
 Start snapshot" button to acquire images from the selected camera.
You can now use the live image mode or the snapshots of the image preview to check whether the current settings of the peripheral device need to be adjusted. If you change the parameter settings, you can instantly see the effects in the image preview.
Keep in mind that the image preview does not represent the exact image that will be acquired by MERLIC and used within your application. For more information about how to use configured image sources in a MERLIC Vision App, see the topic Using Image Sources in MVApps.
Configuring the Device
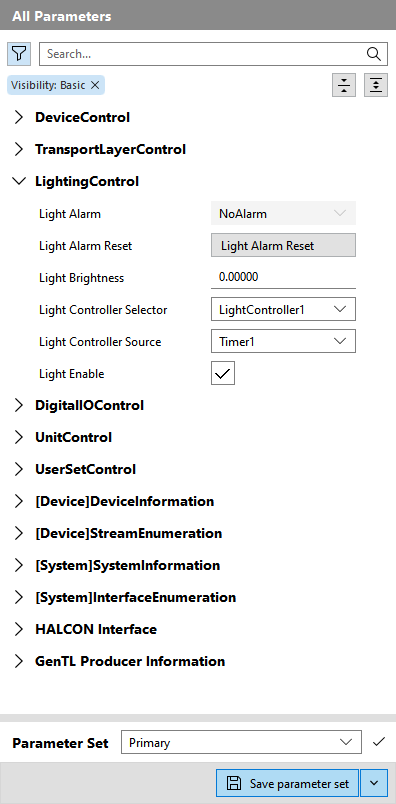
You can find the parameters of the peripheral device on the right in the section "All Parameters". It shows all parameters that are available for the respective device.
To adjust the value of a parameter, you can simply use the respective controls and input fields. If you selected a camera for the image preview and activated the live mode, you can instantly see how the parameter changes affect the acquired images.
During the configuration, you can make use of the same auxiliary functions as provided for the configuration of camera devices. You can take a single snapshot or activate the live mode of the camera for a continuous acquisition. You can use the zooming options for the image preview, and you can save snapshots of the current live image on your computer. For more detailed information on how to use these features, see the sections Acquiring Images for the Preview, Zooming Images, and Saving Snapshots in the topic Configuring Camera Devices.
Adjusting the Parameters
- Select the parameter you want to adjust in the section "All Parameters". If you need help finding the desired parameter, you can try the following options:
- Expand and collapse the parameter categories to show or hide the respective parameters with its values.
- Refresh the parameter list. This might be useful if the parameter you want to adjust is disabled or if you cannot find it. A refresh also updates the parameter values that might have been changed automatically due to changes at another parameter. You can recognize which parameters and parameter categories have been automatically updated by a blue bullet point that is shown beside the parameter name or category name.
- Filter the parameter list to show only specific parameters instead of all of them, for example, to show only persistent parameters. The available filter options are the same as those for filtering parameters of a camera device. For more information, see the section Filtering the Camera Parameters in the topic Adjusting Camera Parameters.
- Use the search field to find a specific parameter or category. For more information, see the section Searching for Camera Parameters in the topic Adjusting Camera Parameters.
- Adjust the parameter value using the respective control. The new value is directly applied and used by the peripheral device. If a parameter cannot be set, it is grayed out, for example, due to a specific setting of another parameter.
- Check your changes in the image preview using the live mode or a new snapshot. If no image is available yet, select the camera for the image preview. You can then activate the live mode for the camera or take a snapshot to check how the current parameter settings of the peripheral device affects the images acquired by the selected camera.
- If necessary, make some further adjustments to the parameters.
- Save the parameter settings to ensure that the changes are not lost when the device is reconnected.
Retention of Parameter Changes
- Only persistent parameters can be saved. The changes are saved to the respective configuration files (.pers Files of the type .pers are used for the MERLIC Image Source Manager. They contain persistent parameters for a specific camera device. .pers files are used in combination with a .json configuration file. files). Thus, the saved parameter settings will be restored after reconnecting the peripheral device.
- Non-persistent parameters cannot be saved. Thus, changes to non-persistent parameters will be lost when rebooting or reconfiguring the device. The same also applies when the device is disconnected. You can recognize non-persistent parameters by the icon
 .
.
If the parameter changes are not saved, they are retained as long as the peripheral device is powered on and not reconfigured even if MERLIC Creator or MERLIC RTE is restarted. A reconfiguration might be initiated, for example, by another software or by activating a different image source configuration which also contains the same device as image source but with different parameter settings. If you want to ensure that your changes will be restored even after reconnecting the peripheral device, you have to save the changes.
Reconnecting the Device
In some cases, the peripheral device might not be connected anymore and therefore the parameters are not available for configuration. In this case, you can try to reconnect to the camera with the button "Reconnect" on the bottom of the image preview.
Looking Up Further Information
You can get further information on the selected image source beneath the image preview in the "Info" area.
|
Info |
Description |
|---|---|
|
Image source |
Name of the image source |
|
Device |
Name of the device |
|
Interface |
Image acquisition interface |
|
IP |
IP address of the device (only if the configuration is active) |
|
Status |
Current status of the device |

